Introduction
This page is intended for instructions on how to get and use mga-advisor.
It still needs to be packaged, but the source can be found here https://gitweb.mageia.org/software/infrastructure/mga-advisor/
You need form.ui and mga-advisor.py from the tree
If ~/mageia-advisories/advisories/ is where you store the advisories, then it is best to put these files there, too (without svn-adding them), but even if you put them somewhere else, mga-advisor will write its output to the ~/mageia-advisories/advisories/ directory.
To work, it needs:
python3
python3-pyside6-widgets
python3-pyside6-core
python3-pyside6-gui
python3-pyside6-uitools
python3-yaml
You can start it with:
python mga-advisor.py
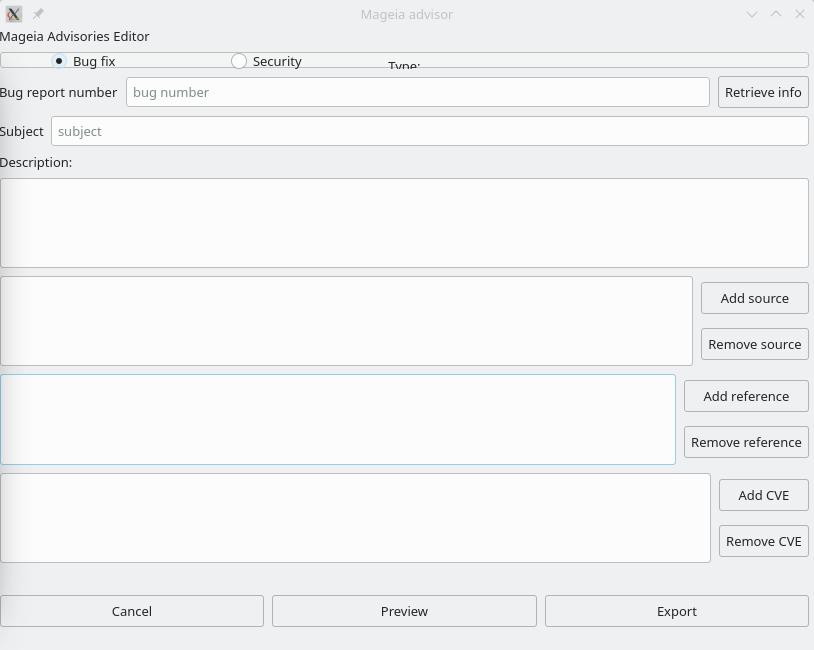
You will then see the screen below:
Usage
I'm assuming you already can commit advisories, see the page How to create an update advisory for information.
Check in the bug report whether fields like "Source RPM:" and "CVE:" contain the right information. After that you can start to work in the mga-advisor window. In the Bug report number field, type or paste the number of Mageia's bug report and then click on Retrieve info. The program will automatically import some information.
Check whether the Subject needs to be edited.
Usually the Description is provided by the packager or reporter, but sometimes you need to dig upstream or in the information about the CVE(s) to fill this field.
Check in the field next to the Add source button whether all the SRPMs are listed. If necessary, use the button one or more times to provide the full list.
Use the button Add reference when needed and as often as needed to complete the list. References are usually provided by the packager. Sometimes the only needed reference is the link to Mageia's bug report, which is automatically added by the tool. The tool will also fetch the references in the "URL:" field. It is not needed to add references to the online CVEs, they will be added automatically, when the advisory is processed after being uploaded.
BEFORE clicking on the Export button make sure you have updated your SVN copy. When clicking on Export, a file "bugnumber.adv" is created in your copy of SVN. After that, you can proceed to add the new advisory to SVN and the Final steps to commit the advisory.
| Note: If you do not want to take various Add source, Add reference or Add CVE steps you can Save some time, to do this you must click on Export first, so make sure the basic information is right (Bug number, Description Subject, and when and if needed in each case: At less one CVE, one reference and one source) |
