Contents
- 1 Why is this here?
- 2 USER MANAGEMENT
- 3 PREPARING BOOTLOADER
- 4 MONITOR
- 5 SUMMARY
- 6 UPDATES
- 7 CONGRATULATIONS
Why is this here?
This page shows the places in the Configuration section of DrakX-installer where there are Help buttons and any Advanced screens which the help should also cover. They currently need text writing for them.
Images are resized to 600x450.
See also the Installation section which also need help texts writing.
Update: There are still a few screenshots missing from the Summary section. If you can supply them please do so.
Update: Most screenshots are there now.
USER MANAGEMENT
drakx-setRootPassword-sect1.xml
drakx-addUser-sect1.xml
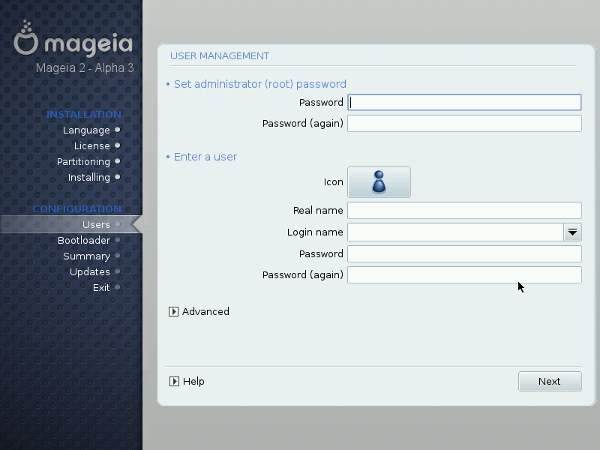
This is the most crucial decision point for the security of your GNU/Linux system: you must enter the root password. Root is the system administrator and is the only user authorized to make updates, add users, change the overall system configuration, and so on. In short, root can do everything! That's why you must choose a password which is difficult to guess: the installer will tell you if the password you chose is too simple. You're not forced to enter a password, but we strongly encourage you to do so. GNU/Linux is just as prone to operator error as any other operating system. Since root can overcome all limitations and unintentionally erase all data on partitions by carelessly accessing the partitions themselves, it is important that it be difficult to become root.
The password should be a mixture of alphanumeric characters and at least 8 characters long. Never write down root's password — it makes it far too easy to compromise your system.
One caveat: don't make the password too long or too complicated because you must be able to remember it!
The password won't be displayed on screen as you type it. To reduce the chance of a blind typing error you will need to enter the password twice. If you do happen to make the same typing error twice, you will have to use this incorrect password when you try to connect as root, at least for the first time.
| Note: If you happen to have problems remembering passwords, or if your computer will never be connected to the Internet and you absolutely trust everybody who uses your computer, you can choose to have No password. Please bear in mind that this is an insecure option, and it is not recommended. |
--
GNU/Linux is a multi-user system which means each user can have his or her own preferences, own files and so on. But unlike root, who is the system administrator, the users you add at this point won't be authorized to change anything except their own files and their own configurations, protecting the system from unintentional or malicious changes which could have a serious impact on it.
You will have to create at least one regular user for yourself — this is the account which you should use for routine, day-to-day usage. Although it's very easy to log in as root to do anything and everything, it may also be very dangerous! A very simple mistake could mean that your system won't work any more. If you make a serious mistake as a regular user, the worst that can happen is that you'll lose some information, but you won't affect the entire system.
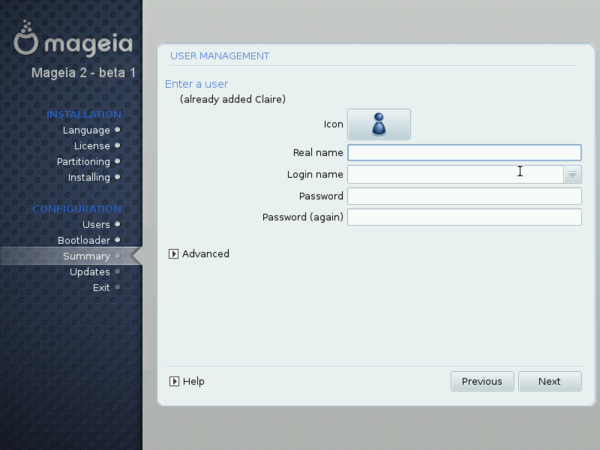
The first field asks you for a real name. The installer will use the first word you type in this field and copy it, all in lowercase, to the Login name field, which is the name this user will enter to log on to the system. You can override it and change the Login Name. The next step is to enter a password. From a security point of view, a non-privileged (regular) user's password is not as crucial as the root password, but that's no reason to neglect it by making it blank or too simple: after all, your files could be the ones at risk.
Tip:
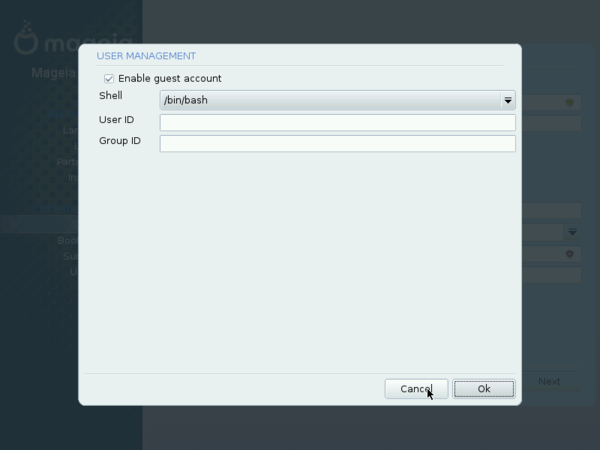
Clicking the Advanced button allows you to create a guest account and configure it (default shell, user and group ID for internal identification).
--
THIS IS MY VERSION PLEASE DEL IF NOT REQIRED!! (Led43)
Set Administrator (root) Password:
It is advisable for all Mageia installations to have an administrator's password, as you type a password into the top box the shield in its corner will change from red to yellow to green depending on the strength of the password. A green shield shows you are using a strong password. You need to repeat the same password in the box just below the first password box, this checks that you have not miss typed the first password by comparing them.
Note: All passwords are case sensitive, you can use a mixture of letters (upper or lower case) and numbers in a password. You can not use ; / ' " ????? This should be checked!
Note: You can set up your PC with no administers password, but this is very insecure especially if you are connecting to any type of network.
Enter a User:
Icon: if you click on this button it will change the users icon.
Real Name: Insert a users real name into this text box. This is not case sensitive.
Login Name: Here you can type in a log in name or drakx will use a version of the users real name.
Note: This is case sensitive
Password: In this text box you should type in a users pass word. Again it has a shield in the corner of the text box that indicates the strength of the users password. (See the note above about characters you can use)
Password (again): Retype the users password into this text box and drakx will check you have the same password in each of the users password text boxes.
tech validation: half-grenoya (both are technically correct, but it's too long now that both steps are together, maybe cutting introduction of the second part will do the trick ?)
English validation:
--
Advanced
If the “advanced” button is clicked then you get offered this screen that allows you to set up a guest account. The guest account allows a guest to log into and use the PC but has restricted access to the administrator tools and other users personal files and desktop settings.
Enable Guest Account: Here you can enable / disable a guest account
Shell: This drop down list allows you to change the shell used by the guest, options are Bash, Dash and Sh
User ID: This lets you set the guest users Identification.
Group ID: This option lets you set the Group Identification for the guest user.
PREPARING BOOTLOADER
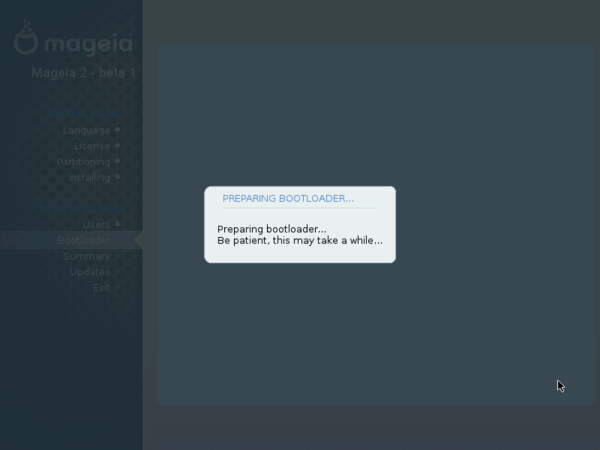
This may actually come before the MONITOR setup.
It does come before the MONITOR setup :)
Does not appear in a vm install with 1 hard drive and no previous partitions (Led43)
The MONITOR setup doesn't always appear, I don't know what triggers it, only that sometimes you get it after the "preparing boot-loader" screen and before the summary screen. Other times you'll get the summary screen, but the graphical interface wasn't configured (the letters are red then) Of course, it happens too that the interface is configured well automatically
MONITOR
Appears this is in the Bootloader section. We could maybe ask for more sections.
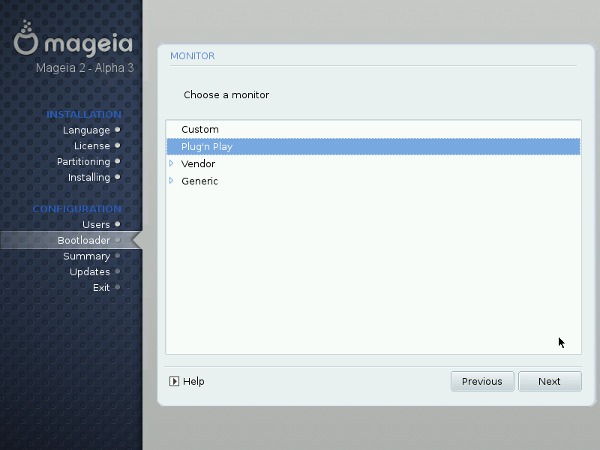
This screen doesn't always appear automatically. If it doesn't, it can only be chosen from the Summary - Graphical Interface
In this monitor set up screen you can set up the type of monitor you have. Drakx defaults to a generic 1024 X 768 @ 60 Hz. This stands for desktop size 1024X 768 and a refresh rate of 60Hz.
Custom: If you have a monitor that's not very common and you know its perimeters you can set them using the custom settings.
Plug' n Play: If your monitor confirms to the Plug 'n Play standards then you can use this setting
Vendor: If you know who made your monitor and its model number you can usually choose that option by clicking the “vendor” triangle to expand the vendor list.
Note: Have a look at the back of the monitor for a little sticker for the monitor model and make details or a model number on the front. For example mine is a flat screen HPw1907 which is printed on the bottom right hand corner of the frame.
Generic: If you click the triangle just before the “generic” list you can scroll down and set up an approximation of your monitors capabilities.
Screenshot uploaded to Calenco as dx-selectMonitor.png
SUMMARY
THE HELP TEXT FROM drakx-misc-params-sect1.xml WILL BE INTERRUPTED BY RELEVANT SCREEN SHOTS. IT GOES ON TILL END OF drakx-misc-params-sect1.xml !
The text still needs a lot of work, please feel free to make any enhancements that you are sure of (marja)
drakx-misc-params-sect1.xml
Screen shot uploaded to Calenco as dx-summary.png

Uploaded to Calenco as dx-summary-bottom.png
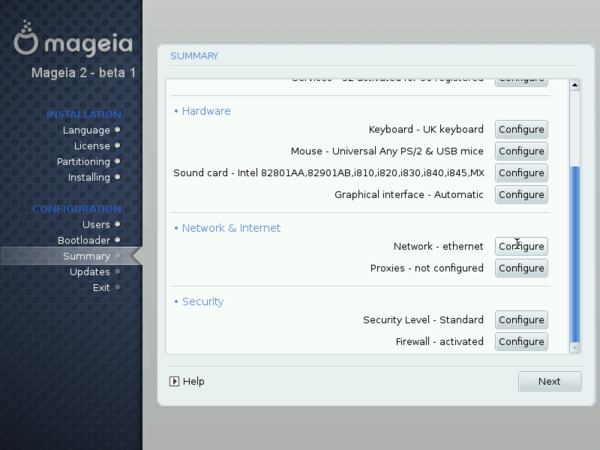
Checking Miscellaneous Parameters
Summary
[dx-summary.png]
As a review, DrakX will present a summary of information it has gathered about your system. Depending on the hardware installed on your machine, you may have some or all of the following entries. Each entry is made up of the hardware item to be configured, followed by a quick summary of the current configuration. Click on the corresponding Configure button to make any changes.
- Timezone: by default, DrakX deduces your time zone based on the country you have chosen. You can click on the Configure button here if this is not correct.
- Country / Region: check the current country selection. If you're not in the country selected by DrakX, click on the Configure button and choose another. If your country isn't in the list shown, click on the Other Countries button to get a complete country list.
- Bootloader: if you wish to change your bootloader configuration, click this button. This should be reserved to advanced users. Refer to the printed documentation or the in-line help about bootloader configuration in the Mageia Control Center.
- User management
- Services: with this entry you can fine tune which services will be run on your machine. If you plan to use this machine as a server it's a good idea to review this setup.
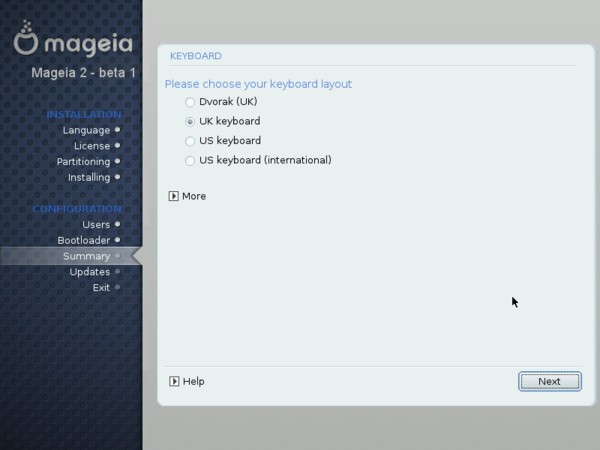
- Keyboard: check the current keyboard map configuration and change it if necessary.
- Mouse: verify the current mouse configuration and click on the button to change it if necessary.
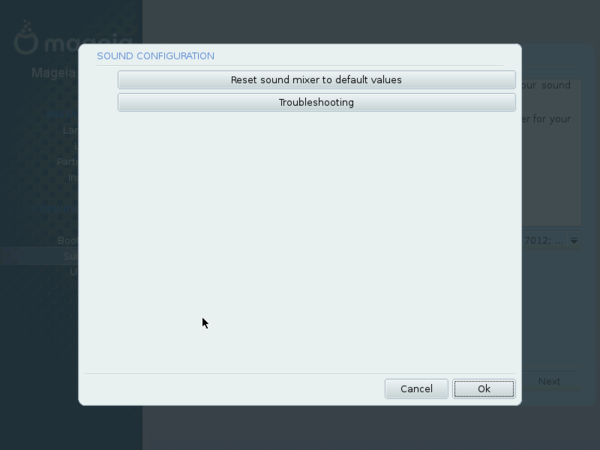
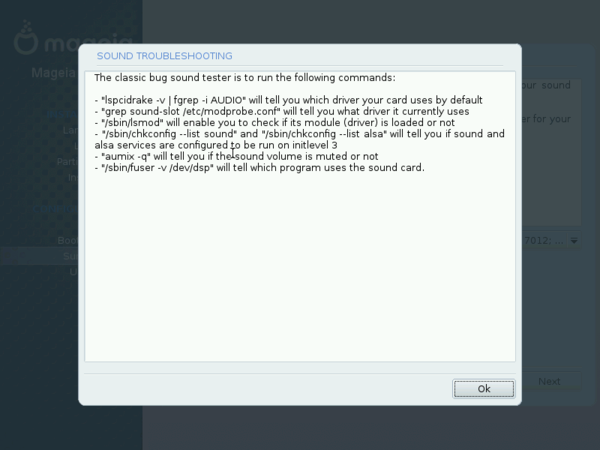
- Sound card: if a sound card is detected on your system, it will be displayed here. If you notice the sound card isn't the one actually present on your system, you can click on the button and choose a different driver.
- Graphical Interface: by default, DrakX configures your graphical interface with a resolution that best matches your video card and monitor combination. If that doesn't suit you, or DrakX could not automatically configure it (not configured is displayed), click on Configure to reconfigure your graphical interface. You can click on Help from within the configuration wizard to benefit from full in-line help.
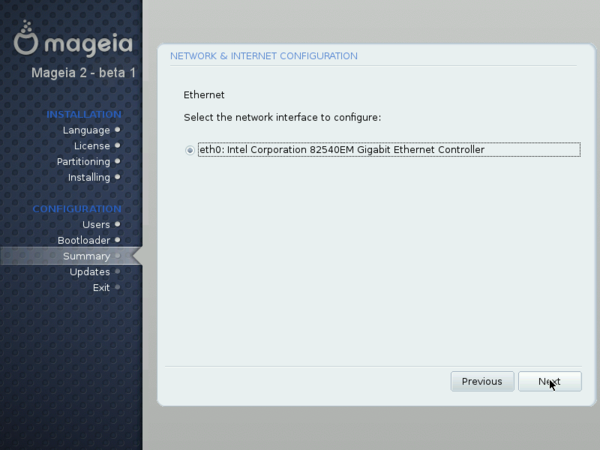
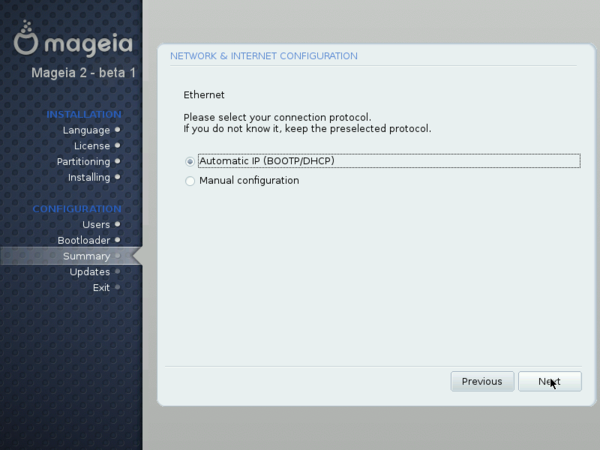
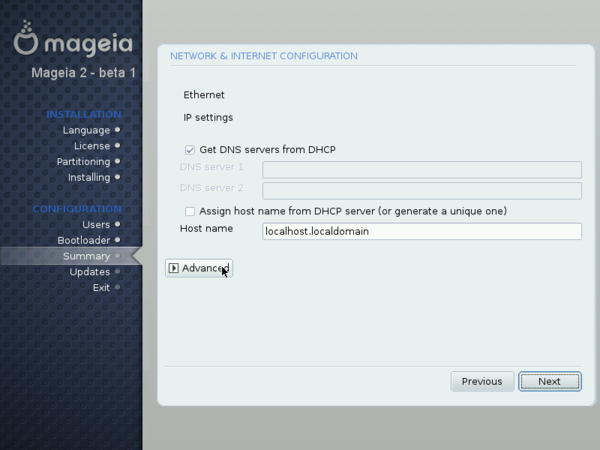
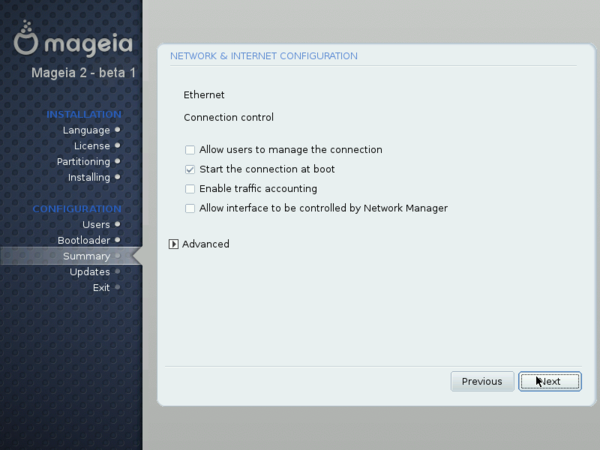
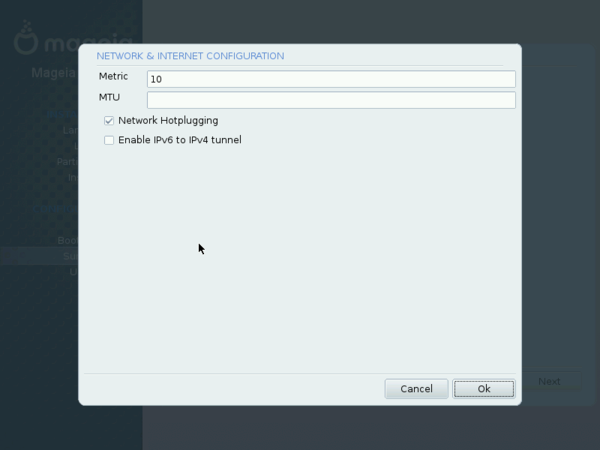
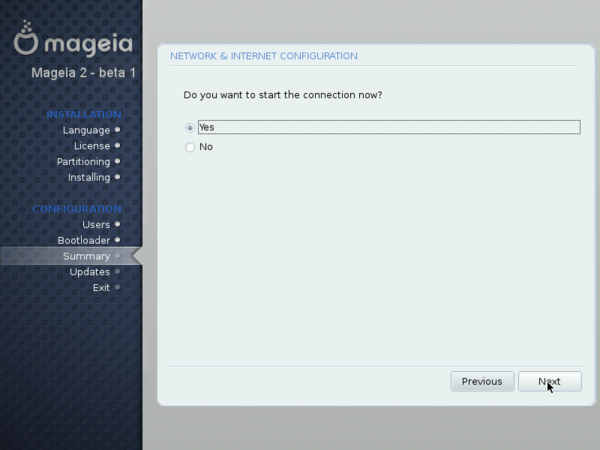
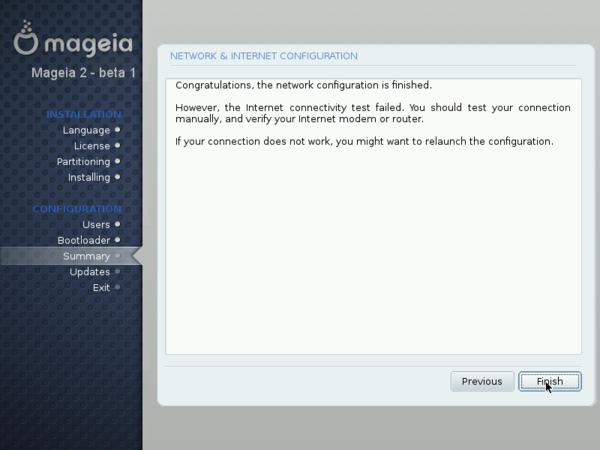
- Network: if you wish to configure your Internet or local network access, you can do so from here. Refer to the printed documentation or use the Mandrakelinux Control Center after the installation has finished to benefit from full in-line help.
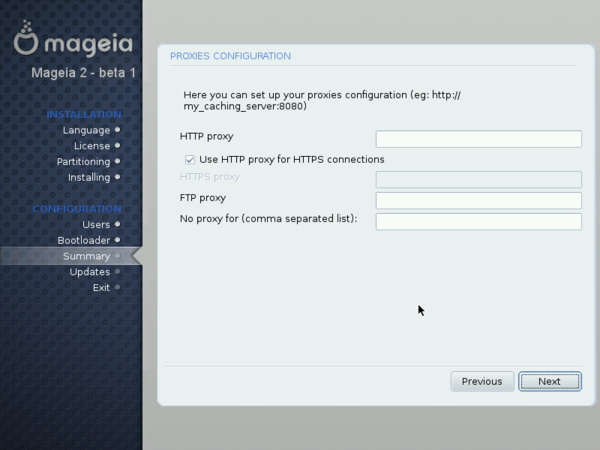
- Proxies: allows you to configure HTTP and FTP proxy addresses if the machine you're installing on is to be located behind a proxy server.
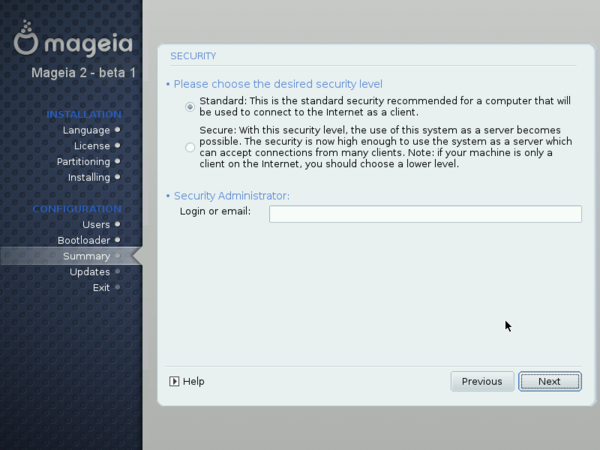
- Security Level: this entry allows you to redefine the security level as set in a previous step (see <[xref] >).
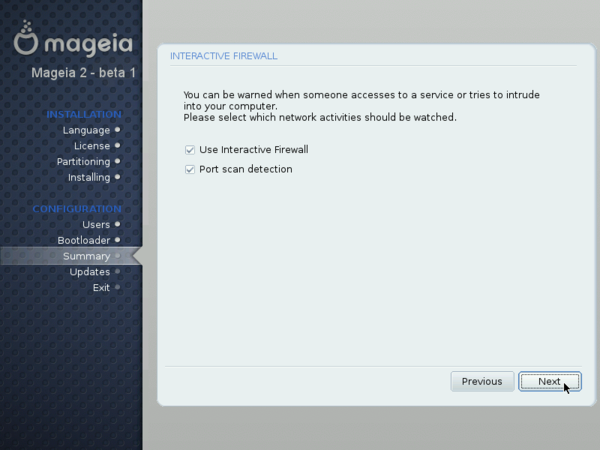
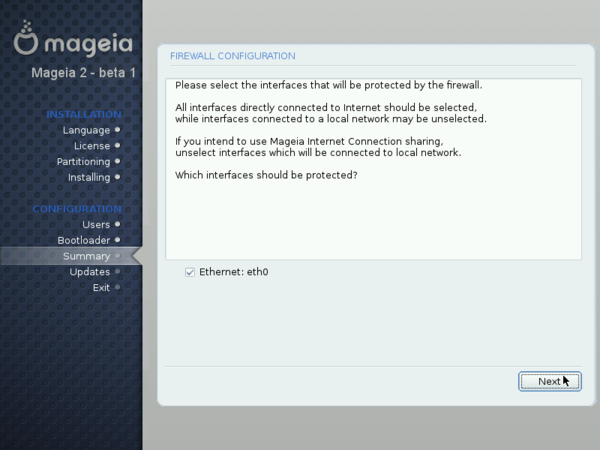
- Firewall: if you plan to connect your machine to the Internet, it's a good idea to protect yourself from intrusions by setting up a firewall. Consult the corresponding chapter of the Starter Guide¶¶<[xref] >¶<[xref] > for details about firewall settings.
Timezone
Uploaded to Calenco as dx-summary-timezone1.png
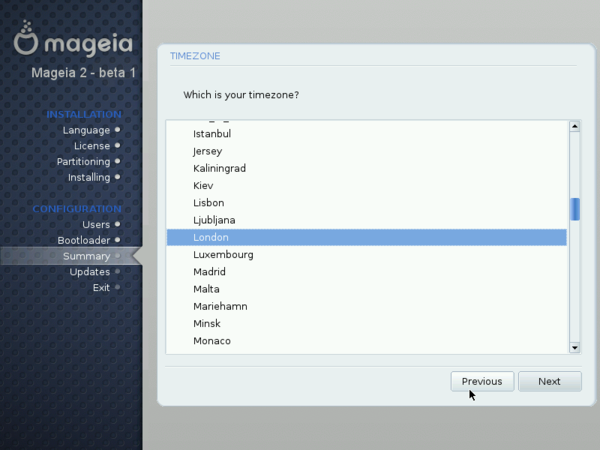
Uploaded to Calenco as dx-configureTimezoneGMT.png

Time Zone Options [dx-configureTimezoneGMT.png]
This dialog appears after selecting a new time zone in the time zones list. After you've chosen the location nearest to your time zone, two more options are shown.
GNU/Linux manages time in GMT (Greenwich Mean Time) and translates it to local time according to the time zone you selected. If the clock on your motherboard is set to local time, you may deactivate this by deselecting Hardware clock set to GMT, which will let GNU/Linux know that the system clock and the hardware clock are in the same time zone. This is useful when the machine also hosts another operating system.
The Automatic time synchronization option will automatically regulate the system clock by connecting to a remote time server on the Internet. For this feature to work, you must have a working Internet connection. We recommend that you choose a time server located near you or the generic World Wide entry which will select the best server for you. This option actually installs a time server which can be used by other machines on your local network as well.
Graphical interface
Missing help file : drakx-setupX
I think next screenshot should go here (marja)
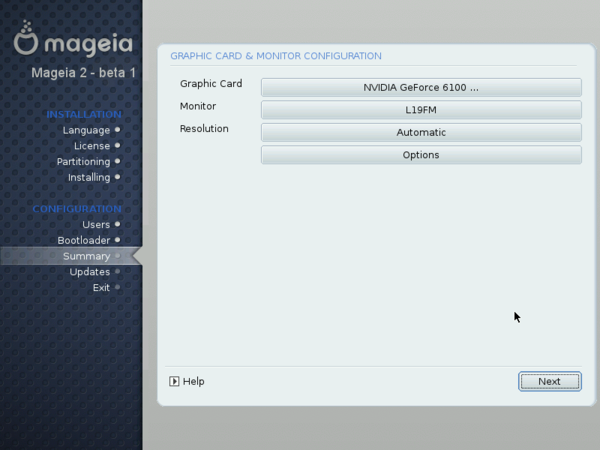
Configuring X, the Graphical Server
[dx-configureX.png]
X (for X Window System) is the heart of the GNU/Linux graphical interface on which all the graphical environments (KDE, GNOME, AfterStep, WindowMaker, etc.) bundled with Mandriva Linux rely on.
You will see a list of different parameters which you can change in order to optimize your graphical display. Graphic Card
If everything works fine, the installer should detect and configure the video card installed on your machine. If the detection or configuration is incorrect, you can choose the card installed on your system from a list. Monitor
If the installer fails to detect or configure your monitor properly, you can choose from this list the monitor which is connected to your computer. Resolution
Here you can choose the resolutions and color depths available for your graphics hardware. Choose the one which best suits your needs (you will be able to make changes after the installation). A sample of the chosen configuration will be shown in the monitor picture.
Test Note:
Depending on your hardware, this entry might not appear.
The system will try to open a graphical screen at the desired resolution. If you see the test message during the test and answer Yes, then DrakX will proceed to the next step. If you don't see it, it means that some part of the auto-detected configuration was incorrect and the test will automatically end after a few seconds and return you to the menu. Change settings until you get a correct graphical display. Options
This step allows you to choose whether you want your machine to automatically switch to a graphical interface at boot. Obviously, you may want to select the No option if your machine is to act as a server, or if you were not successful in getting the display configured.
Services
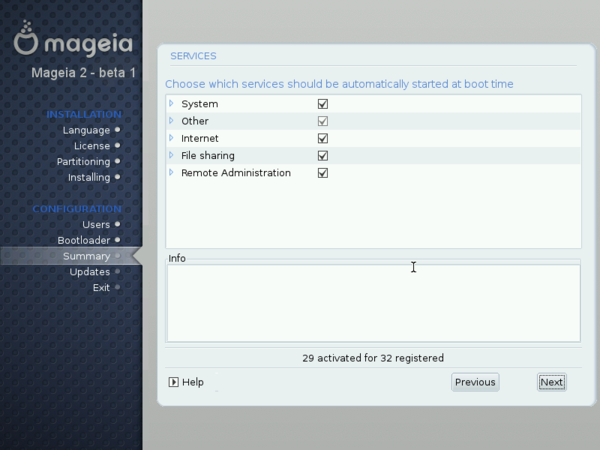
Selecting Available Services at Boot Time [dx-configureServices.png]
This dialog is used to select which services you wish to start at boot time.
DrakX will list all services available on the current installation. Review each of them carefully and uncheck those which aren't needed at boot time. Tip:
A short explanatory text will be displayed about a service when it is selected. However, if you're not sure whether a service is useful or not, it is safer to leave the default behavior. Warning:
At this stage, be very careful if you intend to use your machine as a server: you probably don't want to start any services which you don't need. Please remember that some services can be dangerous if they're enabled on a server. In general, select only those services you really need.
END OF drakx-misc-params-sect1.xml
Country/Region
Uploaded to Calenco as dx-summary-country.png
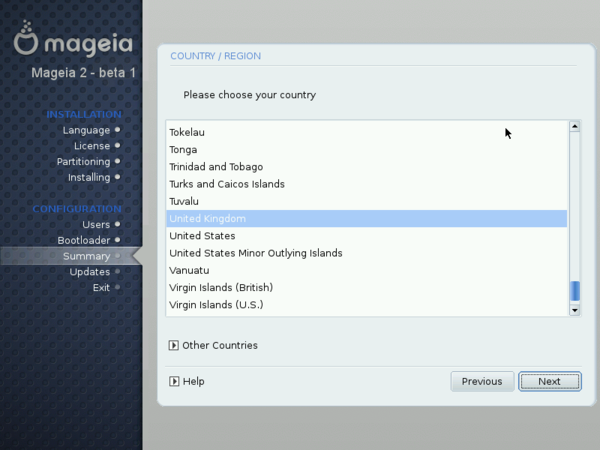
Country/Region: This button will let you change the country that you live. If you can't see your country then click on the "Other Countries" triangle and a drop down list with a lot more options will appear.
Bootloader Main Options
drakx-setupBootloaderBeginne-sect1.xml
Boot loader Main Options: This screen lets you set the boot loader options.
THIS IS MY VERSION PLEASE REMOVE IF NOT REQUIRED (Led43)
Bootloader:
Bootloader To use: The default that Drakx uses is Grub with graphical menu, other choices are Grub with text menu or Lilo with text menu.
Boot Device: The drop down list varies depending on the hardware set up of your PC, it may offer different hard drives or a floppy drive if you have them.
Main Options:
Delay before booting the default image: This text box lets you set a delay in seconds before the default operating system is started up.
Security: This allows you to set a password for the bootloader. This means other people can not enter single user mode or change settings at the boot time.
Password: This text box is where you actually put the password
Password (again): Retype the password and Drakx will check that it matches with the one set above.
Installing a Bootloader
A bootloader is a small program which is started by the computer at boot time. It's responsible for starting up the whole system. Normally, the bootloader installation is totally automated. DrakX will analyze the disk boot sector and act according to what it finds there:
- If a Windows®¶ boot sector is found, it will replace it with a GRUB/LILO boot sector. This way you will be able to load either GNU/Linux or any other OS installed on your machine.
- In any other case it will ask you where it should place the boot loader. Generally, the First sector of the drive (MBR) is the safest place.
--
tech validation : grenoya (If someone doubt : LILO is still proposed for installation)
English validation:
--
Advanced
Has this changed? My screenshot of Advanced shown below this one. Answering myself - no it hasn't changed, they are in the wrong order is all. Correcting.
Advanced:
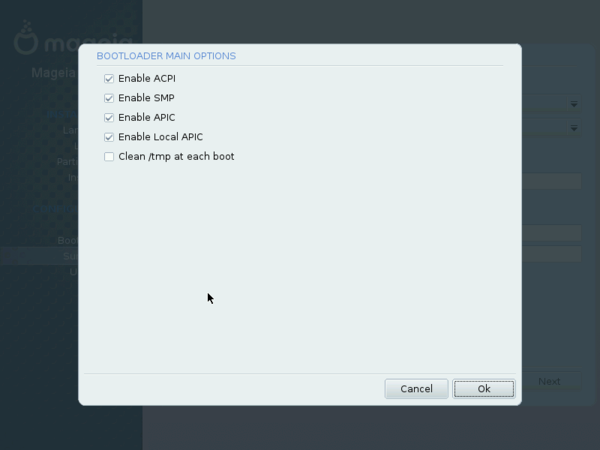
Bootloader Main options:
Enable ACPI: The Advanced Configuration and Power Interface is a platform independent interfaces for hardware discovery, configuration, power management and monitoring. This is were you enable or disable it.
Enable SMP: This option enables / disables symmetric multiprocessing for multi core processors.
Enable APIC: Enabling or disabling this gives the operating system access to the Advanced Programmable Interrupt Controller. APIC devices permit more complex priority models, and Advanced IRQ (Interrupt Request) management.
Enable Local APIC: Here you can set local APIC, which manage all external interrupts for some specific processor in an SMP system.
Clean /tmp at each boot: When enabled this will delete any files in the /tmp directory at boot time, which stops your /tmp directory from filling up.
Bootloader configuration
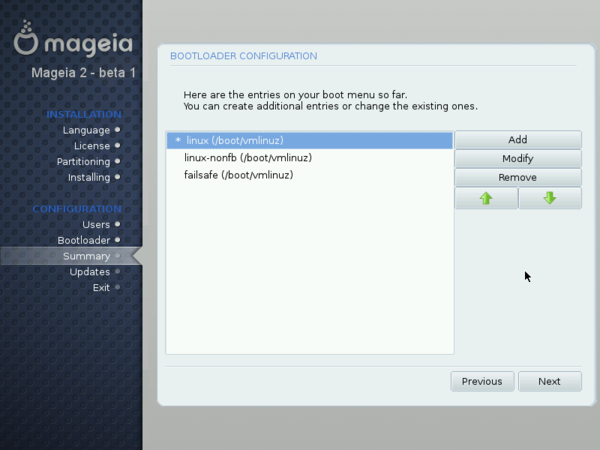
Ounce you have set up the Bootloader Main options and click the “Next Button” Drakx will present you with the next step this screen. The entries that will be shown on the boot menu.
Linux (boot/vmlinuz): This is the standard Mageia. It will be displayed on the menu as “Boot Mageia 2. The little Astrix to the left of the text indicates that this is the default kernel to boot. Linuz-nonfb (boot/vmlinuz): If this is selected then the standard Mageia kernel is booted with the “No Frame buffer argument, which can be handy for certain graphics cards.
Failsafe (boot/vmlinuz): This entry shows as “Boot Mageia 1 (safe mode)” on the boot menu. It will boot a Linux kernel with mouse keyboard and basic graphics card support. This lets you boot the PC and diagnose any problems you might have.
Bootloader modify entry
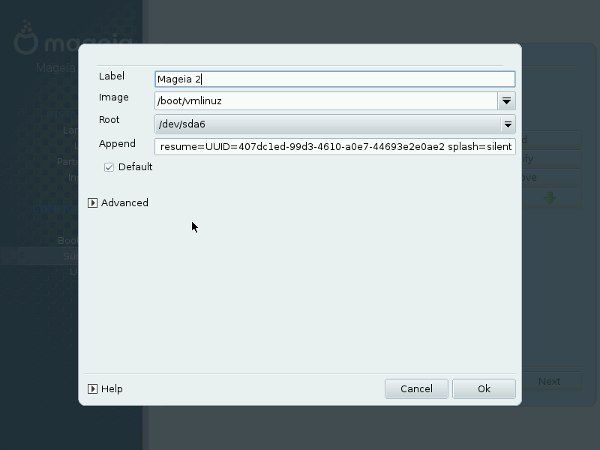
If the “Modify” button was selected drakx will present this screen which allows you to change vireos settings. The only setting thats safe for a novice to change is probably the “Label” text.
Label (Mageia 2): The “Label” is the text displayed on the boot menu, in this case “Mageia 2”. You can change it with out braking the system to any thing you like. To do this place your mouse curer into the “Label” text box, delete the “Mageia 2” and replace with say The Best Operating System Around :-)
Image (boot/vmlinuz): This tells the bootloader which kernel image to boot and where it is in the file system. If you want to use a different kernel you can change this to tell the bootloater where it is
Root (/dev/sda6): This tells the bootloader which hard drive and partition the kernel is on, again this can be change for a different kernel on a different drive and / or partition.
Append: This option lets you pass the kernel information or tell the kernel to give you more information as it boots.
Defualt: This check box sets which operating system the bootloader starts automatically if no choice is made.
Advanced
Video Mode: (800X600 16bpp): This sets the screen size and colour depth the boot menu will use. If you click the down triangle you will be offered other size and colour depth options.
Initrd (/boot/initrd.img): This option allows you to select a boot initrd.img file and tell the bootloader where it is. Again if you click the down triangle and you have other initrd.img files you can select them here. These could be server initrd.img file.
Network Profile: This option will let you change the network profile if you have more than one set up.
User Management
THIS HAS BEEN DONE FURTHER UP THE PAGE (lED43)
Keyboard
THIS HAS ALSO BEEN DONE IN THE "Help_buttons_in_DrakX-installer" (Led43)
Mouse
Sound Card
Advanced
Troubleshooting
Network & Internet
Proxies
Security level
Firewall
UPDATES
CONGRATULATIONS
drakx-exitInstal-sect1.xml
It's Done!
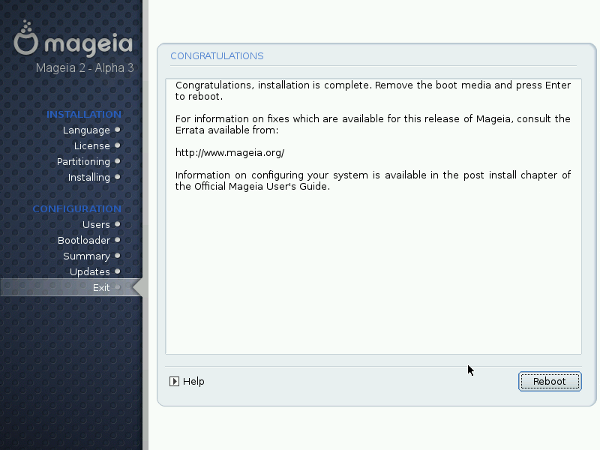
There you are. The installation is now complete and your GNU/Linux system is ready to be used. Just click on Reboot to restart the system. Don't forget to remove the installation media (CD-ROM or USB stick). The first thing you should see after your computer has finished doing its hardware tests is the bootloader menu, which allows you to choose between the OSes your system can boot.
--
PLEASE DO NOT ERASE THE CALENCO FILE AS IT CONTAINS TEXT THAT SHOULD GO SOMEWERE ELSE (but i did not find yet where exactly) : there used to be a advance page, it must have been moved, but where ?
tech validation: grenoya
English validation:
--
