Contents
Introduction
This document describes how to configure the VASCO DIGIPASS SecureClick authentication device in Mageia Linux.
SecureClick is an authentication device that is used in two factor authentication (2FA) and can be used to secure your Google account from Chrome browser.
The SecureClick device also works in Windows.
Please note that there are other 2FA devices available which are also "fido certified" U2F.
Benefits
The key benefit is that using an authentication device for 2 factor authentication (2FA) when you access services that support 2FA it improves your security. Even if your account name and password become known through, for example, data breach of login accounts, an adversary cannot login to your 2FA protected account with just the account name and password because they cannot replicate the second authentication which is done using a physical authentication key in your possession.
Some services also offer 2FA via sending you a code in an SMS text to your mobile. This is reasonably secure but if your mobile phone has also been compromised there is a problem.
Also, it is not always practical to be dependent on your mobile phone being able to receive an SMS text. For example, you might be travelling overseas, you might have no mobile phone network signal, or your mobile phone may have battery with no charge.
By using a separate physical key device which has no network connectivity you have better security and reliability.
A particular benefit of the SecureClick device is that it uses bluetooth connectivity and can also be used for 2FA with supported versions of Android on mobiles and tablets.
Hardware
The SecureClick consists of two parts:
- a security key token which connects via Bluetooth to
- a USB bridge connected to the computer.
Reference: https://www.amazon.co.uk/gp/product/B01M0DPK3K/ref=oh_aui_detailpage_o00_s00?ie=UTF8&psc=1
Preparation
We need to add some udev rules for the new device by creating a file /etc/udev/rules.d/70-fido.rules like this:
# Add udev rules for SecureClick USB device
#
# (copy & paste, run as root):

cat << EEOOFF > /etc/udev/rules.d/70-fido.rules
# Vasco usb
KERNEL=="hidraw*", SUBSYSTEM=="hidraw", ATTRS{idVendor}=="0483", ATTRS{idProduct}=="f1d0", TAG+="uaccess", MODE="0666"

# Vasco SecureClick
KERNEL=="hidraw*", SUBSYSTEM=="hidraw", ATTRS{idVendor}=="1a44", ATTRS{idProduct}=="00bb", TAG+="uaccess", MODE="0666"

# Vasco SecureClick
KERNEL=="hidraw*", SUBSYSTEM=="hidraw", ATTRS{idVendor}=="1a44", ATTRS{idProduct}=="80bb", TAG+="uaccess", MODE="0666"
EEOOFF

# (end copy & paste)
After creating file /etc/udev/rules.d/70-fido.rules, we can verify the key is working.
Verifying SecureClick devices
Vasco provide Chrome browser application called "DIGIPASS SecureClick Manager".
Using Google Chrome, open:
https://chrome.google.com/webstore/detail/digipass-secureclick-mana/gjbcaijefcocakonhdnfhomcnlcppbcg?utm_source=chrome-app-launcher-info-dialog
and click on "Launch App".
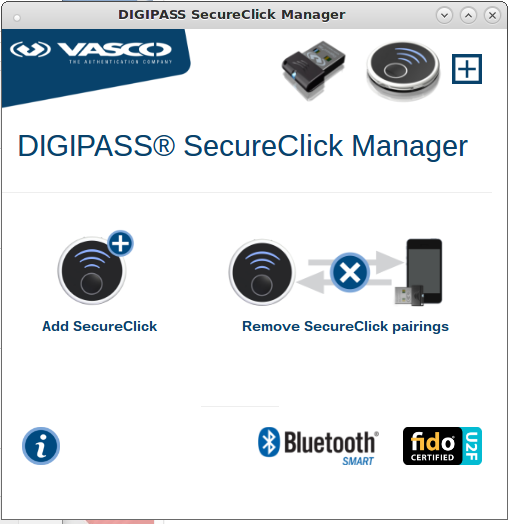
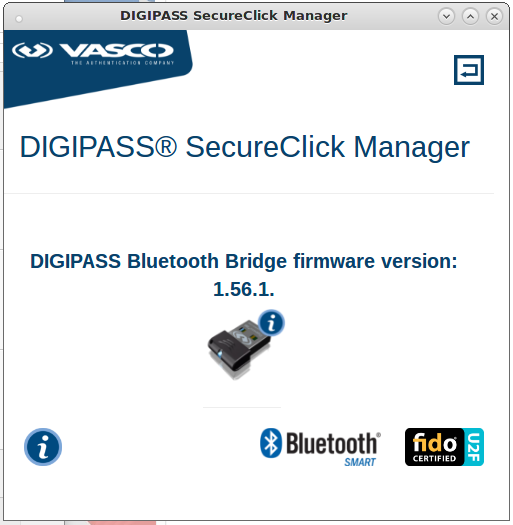
With the USB bluetooth bridge plugged into the computer, click on the usb bridge image above the word "SecureClick" in the app window.

|
It should next display: "DIGIPASS Bluetooth Bridge firmware version" which in this example is "1.56.1".

|
Click on the return icon at top right (arrow back in square above the word "Manager"). That should bring you back to the following (below).
From here we can click on the image of the SecureClick key device at top right (above word "Manager") to verify connectivity with the key.

|
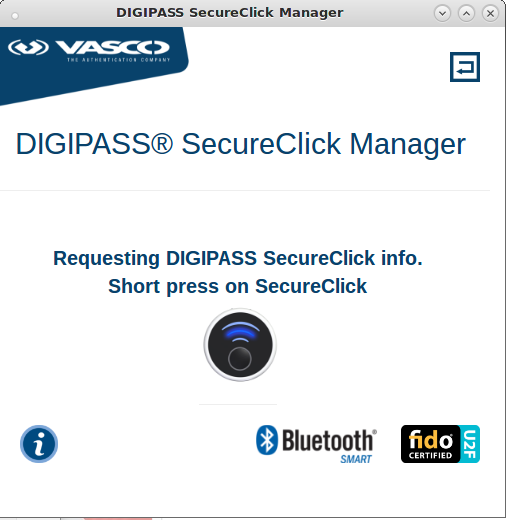
Press the SecureClick key and this will start an exchange between the SecureClick and the USB bridge beginning with alternate blue LED flashes which should settle to steady green.

|
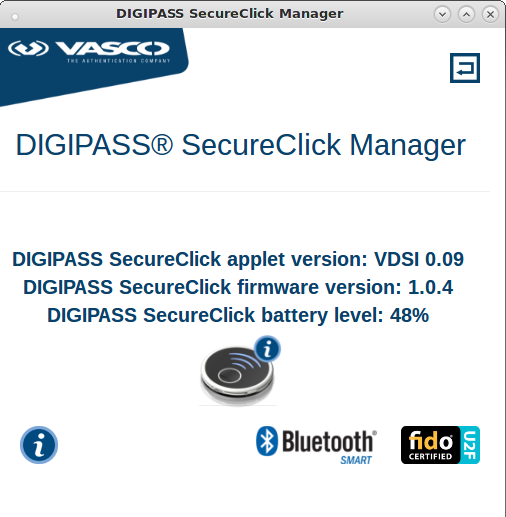
When green LED is on, briefly press the SecureClick key and the details of the SecureClick should be displayed in the "DIGIPASS SecureClick Manager" app:

|
Once you have verified that the two devices: USB device in computer and SecureClick key have been identified using the "DIGIPASS SecureClick Manager" app in Google Chrome you can then follow the steps to enable 2FA on your Google account as described here: https://support.google.com/accounts/answer/185839?hl=en
References and links
Here are some relevant and useful links:
| ordinal | comment | link |
|---|---|---|
| 1 | Vasco Chrome browser app "DIGIPASS SecureClick Manager" to verify key connectivity. | https://chrome.google.com/webstore/detail/digipass-secureclick-mana/gjbcaijefcocakonhdnfhomcnlcppbcg?utm_source=chrome-app-launcher-info-dialog |
| 2 | SecureClick manual | https://www.vasco.com/images/DP-SecureClick-User-Manual_tcm42-52179.pdf |
| 3 | SecureClick product | https://www.vasco.com/products/two-factor-authenticators/hardware/one-button/digipass-secureclick.html |
| 4 | Vasco knowledge base | https://www.vasco.com/support/product-support/knowledge-base.html?elqTrackId=2a1b33912d2e43778cdf683f30cd8a97&elq=95bd309775a247c3aacadc8310e4fc8f&elqaid=3465&elqat=1&elqCampaignId= |
| 5 | Use Security Key for 2-Step Verification in Google | https://support.google.com/accounts/answer/6103523 |
| 6 | Turning on 2 factor authentication in Google | https://support.google.com/accounts/answer/185839?hl=en |
| 7 | Add a Security Key to your Google Account | https://support.google.com/accounts/answer/6103534 |