| Other languages english ; français ; |
| Synopsis: This page will allow you to install your own DNS server, secured by DNSSEC, with a local cache to speed up domain name resolution and with tier DNS respecting your data privacy. |
Contents
What for?
Like the old times when we had a phone directory book, the internet needs a way to link a website name to its IP address. As you might know already, any machine has its own IP address to identify it. As it is easier to remember a street name than GPS coordinates, it is easier to remember a website name than its IP address.
The "phone directory" of the internet is called Domain Name Server (DNS). Internet domains are sliced in a tree structure and there is a server hierarchy to drill down into it. There are thirteen servers worldwide (called root servers) to cover the first level of this tree. Without entering into details, this limited number is connected to the way IPv4 works. There are also "copies" spread across the world as clusters, increasing the total number to about 1400 servers. When you ask to connect to a website, you will need to resolve the name i.e. find the IP of the machine hosting this website. Querying the root server will come first and it might not be enough to resolve the IP; 2 more servers (Top Level Domain server and Authoritative server) might have to be involved in the sequence. It will then slow down the process, even if it is usually rather quick.
In addition, your ISP usually provides its own DNS server to start the name resolution process above. Your ISP DNS server should have also some other DNS servers in the cache to speed up the domain name resolution.
By that, all the websites you visit will be known by your ISP. It might bring some concerns regarding data privacy and bandwidth control. In some countries, it is a way to apply censorship. In addition, if a hacker is able to substitute the IP address a website name points to, you will reach the hacker's server without knowing it.
To restore your privacy and to promote internet neutrality, one option is to install your own DNS resolver like unbound.
In addition, unbound offers a caching service, avoiding querying the IP address across the web if you have visited already once this website; it will improve your web browsing experience. It will also decrease the load of the root servers, helping the internet community and saving some energy (every drop counts :) ).
Not only web browsers need to resolve a domain name. For instance, email client needs to as well. Unbound working at the system level will improve and secure any DNS query.
To ensure the IP address found is not corrupted, encrypted DNSSEC (Domain Name System Security Extensions) authentication of DNS data will be activated.
You could also block some sites thanks to unbound but it will not be covered here.
You could also use one machine of your local network to serve as a DNS resolver for all the others. It will not be covered here either.
Limited command line knowledge is required to install and to configure unbound. You will have mainly to know how to edit a text file in a console window, as root (with nano or vi text editors for instance).
Installation
Package
unbound is included in Mageia repositories.
You can install it either by using Mageia Control Center GUI or by using the following command line, as root :
| # urpmi unbound |
Root servers
Then, we need to get a local copy of the root server list to initialize our configuration.
| # curl --output /etc/unbound/root.hints https://www.internic.net/domain/named.cache |
This list changes sometimes to time but not frequently. It is wise to update it every month thanks to a systemd timer.
A systemd timer is an alternative to a crontab job. It is easier to manage (start and stop for maintenance for instance), especially when you have created many cron jobs.
This approach requires two files: /usr/lib/systemd/system/roothints.service and /usr/lib/systemd/system/roothints.timer
Create these two files with your favorite text editor, as root.
/usr/lib/systemd/system/roothints.service should look like this:
| [Unit] Description=Update root hints for unbound After=network.target [Service] ExecStart=/usr/bin/curl -o /etc/unbound/root.hints https://www.internic.net/domain/named.cache |
/usr/lib/systemd/system/roothints.timer should look like this:
| [Unit] Description=Run root.hints monthly [Timer] OnCalendar=monthly Persistent=true [Install] WantedBy=timers.target |
Now, start and enable the timer by running this command, as root:
| # systemctl enable --now roothints.timer |
DNSSEC
The purpose of this section is to set the digital signatures required by DNSSEC, in order to validate the DNS answers.
As chroot is used to keep the execution within /etc/unbound, the key file is placed in the /etc/unbound folder and the unbound user will need to be able to write into.
As root, run the 2 commands below in a console window:
| # unbound-anchor -v -a /etc/unbound/root.key |
| # chown unbound /etc/unbound |
NTP setup
If a record is out of date or if it exists in some future date, Unbound will not resolve that domain correctly.
So, the system time of your machine has to be in sync with other machines across the world, by using Network Time Protocol.
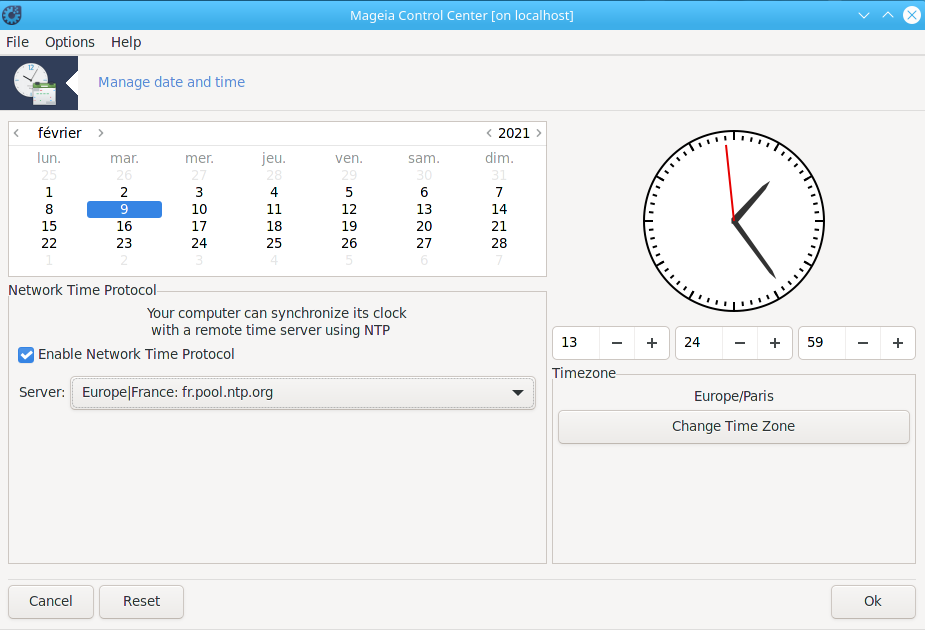
To do that, launch Mageia Control Center and go to the System tab. Then, click on Manage date and time.
There, you tick the box Enable Network Time Protocol and you choose a Server nearby you.
Finish by clicking on Ok.
To check NTP is active, run:
| $ timedatectl |
which will return something similar to:
| Local time: lun. 2021-07-12 21:02:39 CEST Universal time: lun. 2021-07-12 19:02:39 UTC RTC time: lun. 2021-07-12 19:02:39 Time zone: Europe/Paris (CEST, +0200) System clock synchronized: yes NTP service: active RTC in local TZ: no |
System clock synchronized: yes and NTP service: active confirm the proper setting.
Configuration
Before starting, if you are curious, it is interesting to go to DNS leak test and run the standard test to check the DNS servers used so far.
You will compare the results after unbound is up and running.
Unbound configuration file
Now, it is time to complete unbound configuration and to start it.
The configuration file is /etc/unbound/unbound.conf. A lean version is already provided by the Mageia dev team.
If you want to go deeper, there is a full version to look at : /usr/share/doc/unbound/unbound.conf
The following adjustments will be made:
- Root server file location will be set.
- Key file location for DDNS will be set.
- Local IP resolution will be set to access an ISP router.
- Trustworthy tier DNS server respecting data privacy will be set to complement root server resolution process.
- IPv4 will be the preferred protocol for the DNS query. It is because my ISP is not fully compliant with IPv6 yet and it has led to some issues. I have then deactivated IPv6 locally. You should be able to get it to work in some conditions if you would like though.
To access my router interface, I need to connect to an address like mybox.myisp_domain
My ISP DNS is able to resolve it but neither the root server route nor a tier DNS is. The local-zone section will be used in /etc/unbound/unbound.conf to instruct to reach directly the IP address of the router, short-cutting the DNS resolution process.
Actually, trying to connect by typing the IP address of the router directly in the browser address field has not worked. It is like my router was replacing the IP by the address name to complete the connection, which was failing if a DNS query was made.
You can also use the local-zone section to instruct to shortcut the DNS query process to reach out a server on your local network, from a local client.
| Note: If you have this need to connect to your ISP router, uncomment and adjust the local-data settings in the unbound.conf below.
|
Finally, it happens that trying to use only the root server route for a DNS query leads to a DNS traffic leak through the DNS servers of your ISP; meaning your ISP DNS servers sneak in.
To avoid that, using the forward-zone section, tier DNS I trust for their privacy will be set; not limited to, I recommend DNS servers from OpenNIC project or FDN or DNS.WATCH
Do note chroot is enabled meaning unbound will work within /etc/unbound
Hence, the path to root.hints and to root.key is relative to /etc/unbound
So now, as root, edit /etc/unbound/unbound.conf and update it in order it will look like:
| server: # the pid file. Can be an absolute path outside of chroot/work dir. pidfile: "/run/unbound/unbound.pid" # Prefer ipv4 upstream servers, even if ipv6 is available. prefer-ip4: yes do-tcp: yes # Detach from the terminal, run in background, "yes" or "no". # Set the value to "no" when unbound runs as systemd service. do-daemonize: no # file to read root hints from. # get one from https://www.internic.net/domain/named.cache root-hints: root.hints # Sent minimum amount of information to upstream servers to enhance # privacy. Only sent minimum required labels of the QNAME and set QTYPE # to A when possible. qname-minimisation: yes # Do not query the following addresses. No DNS queries are sent there. # List one address per entry. List classless netblocks with /size, # do-not-query-address: 127.0.0.1/8 # do-not-query-address: ::1 # if yes, the above default do-not-query-address entries are present. # if no, localhost can be queried (for testing and debugging). do-not-query-localhost: yes # If you want to perform DNSSEC validation, run unbound-anchor before # you start unbound (i.e. in the system boot scripts). And enable: # Please note usage of unbound-anchor root anchor is at your own risk # and under the terms of our LICENSE (see that file in the source). auto-trust-anchor-file: root.key ## DnsSpoof for your home server and router (exact domain name match) ## Do uncomment and set as required. Do keep . at the end of the address to indicate a strict name #local-data: "myserver.mydomain. IN A 192.168.x.y" #local-data: "mybox.myisp_domain. IN A 192.168.w.z" # Remote control config section. remote-control: # Enable remote control with unbound-control(8) here. # set up the keys and certificates with unbound-control-setup. control-enable: no # Forward zones # Create entries like below, to make all queries for 'example.com' and # 'example.org' go to the given list of servers. These servers have to handle # recursion to other nameservers. List zero or more nameservers by hostname # or by ipaddress. Use an entry with name "." to forward all queries. # If you enable forward-first, it attempts without the forward if it fails. # forward-zone: # name: "example.com" # forward-addr: 192.0.2.68 # forward-addr: 192.0.2.73@5355 # forward to port 5355. # forward-first: no # forward-zone: # name: "example.org" # forward-host: fwd.example.com ## ## in the example below, DNS servers from www.fdn.fr and dns.watch are provided ## You can update them with DNS provided by https://www.opennic.org forward-zone: name: "." ##DNS from fdn forward-addr: 80.67.169.12 forward-addr: 80.67.169.40 ##DNS from dns.watch forward-addr: 84.200.69.80 forward-addr: 84.200.70.40 forward-first: no |
In order to check there is no mistake in your configuration file, run as root the following command:
| # unbound-checkconf /etc/unbound/unbound.conf |
Now, it is time to enable at boot and to start unbound service by running, as root:
| # systemctl enable --now unbound |
DNS change in Drakconnect
It is needed to tell the system to use your machine as your own DNS.
To do so, double click on the net_applet on the tool bar or open Mageia Control Center and go to Network & Internet.
Then, click on the interface you use (Wired or Wifi) and click on Configure
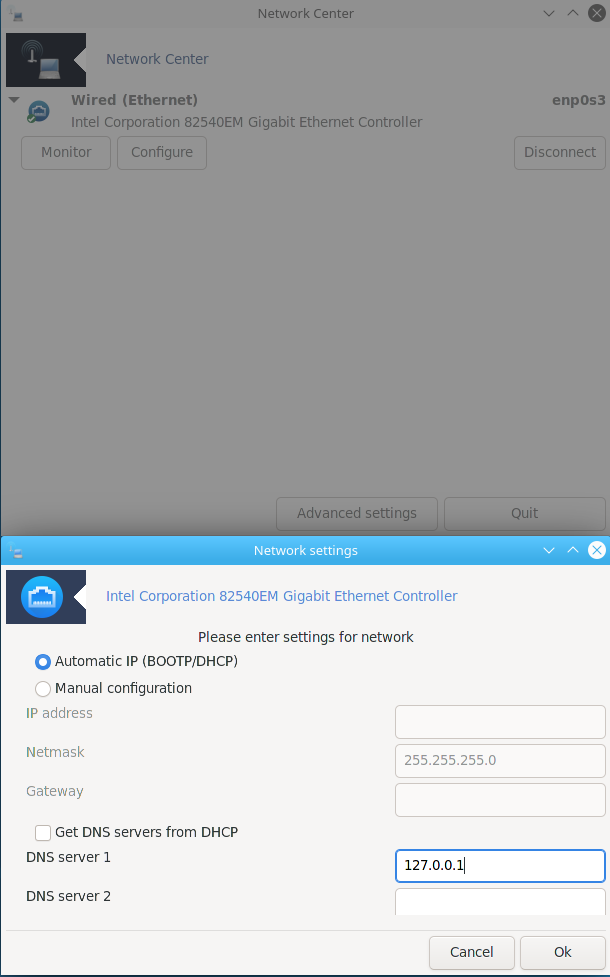
Next, deselect Get DNS servers from DHCP and enter 127.0.0.1 in the field DNS server 1.
Click on Ok to close the Network settings window and on Quit to close the Network Center one.
Optional, if you would like to stay on the safe side, you can disable IPv6 if you have not set any IPv6 DNS.
Again, double click on the net_applet on the tool bar or open Mageia Control Center and go to Network&Internet.
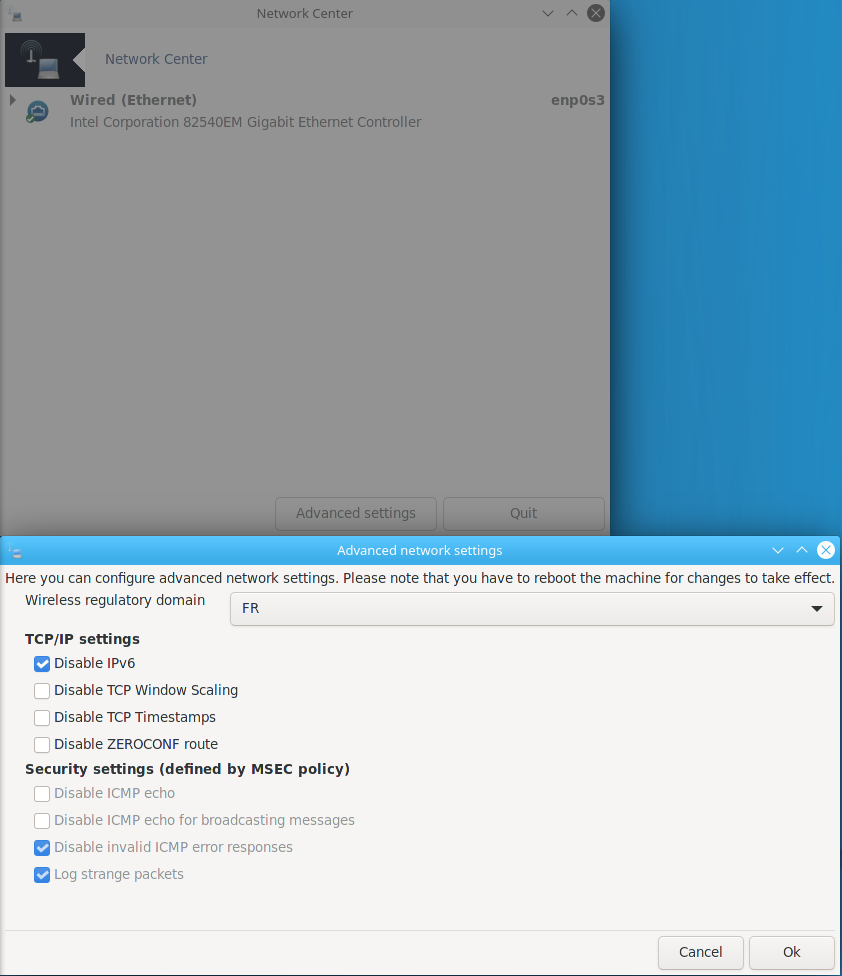
Click on Advanced settings and tick the box Disable IPv6
Click on Ok to close the Advanced network settings window and on Quit to close the Network Center one.
Restart the network interface by running, as root:
| # systemctl restart network |
Tests
Here are a few tests to check your configuration works.
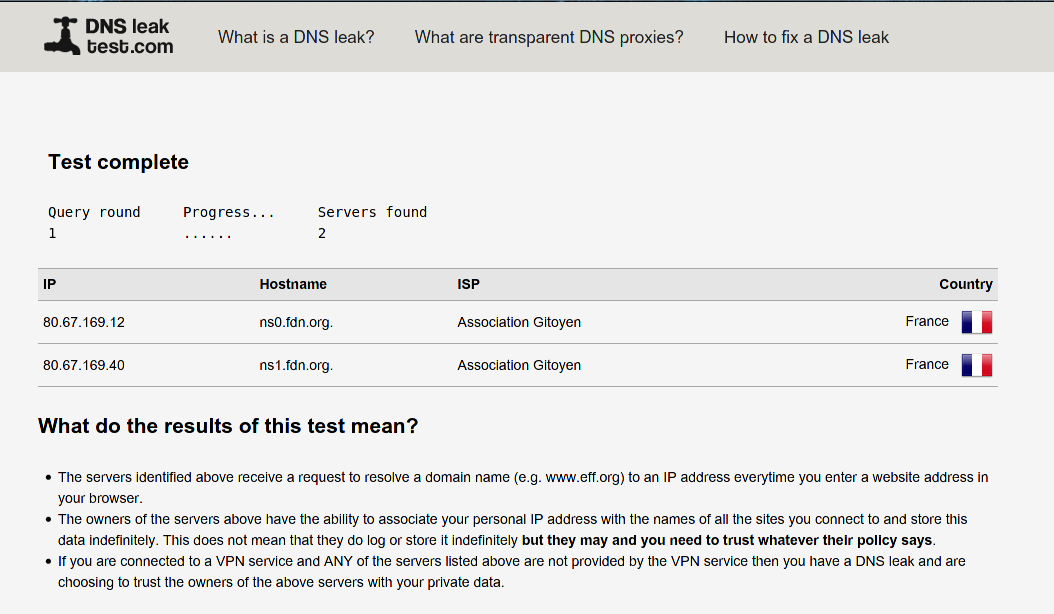
You can run (again) the standard test at dnsleaktest.com If you have set the DNS servers of www.fdn.fr, you should get the results showed below. If you have set other DNS servers, you should see them instead and no other DNS server.
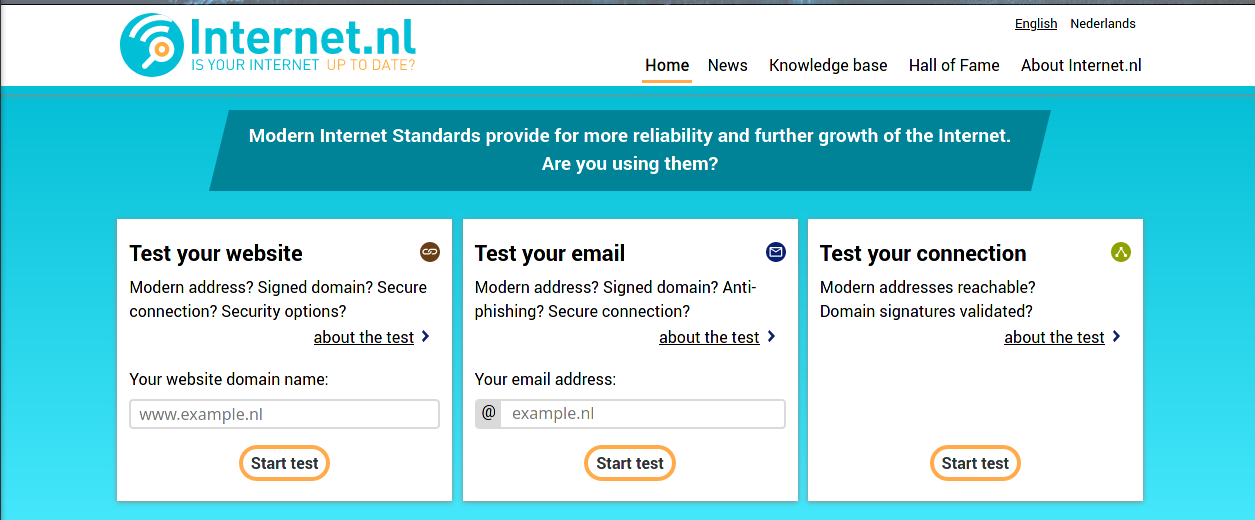
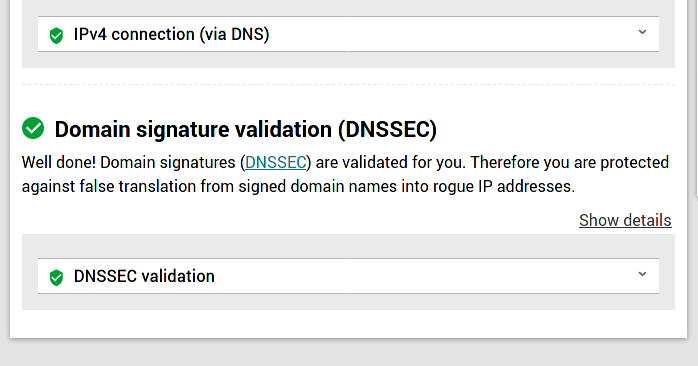
Let us now test DNSSEC works. For that, browse to en.internet.nl and click on Start test under the Test your connection box.
The result will show green symbols in front of the DNSSEC validation test, at the bottom of the page.
Especially if something does not work as intended, you can check whether your machine is actually considered as the system DNS by running:
| $ cat /etc/resolv.conf |
127.0.0.1 is properly considered as your DNS if you get the following result:
| $ cat /etc/resolv.conf # Dynamic resolv.conf(5) file for glibc resolver(3) generated by resolvconf(8) # DO NOT EDIT THIS FILE BY HAND -- YOUR CHANGES WILL BE OVERWRITTEN nameserver 127.0.0.1 search home |
You can also check unbound listens to port 53 to act as your DNS by running as root:
| # lsof -i :53 |
You will then get:
| #lsof -i :53 COMMAND PID USER FD TYPE DEVICE SIZE/OFF NODE NAME unbound 111747 unbound 3u IPv4 888557 0t0 UDP localhost:domain unbound 111747 unbound 4u IPv4 888558 0t0 TCP localhost:domain (LISTEN) |
