| Other languages English ; Nederlands ; |
See also
- Installing Mageia from ISO images on disk using grub2
- Booting Mageia Live from ISO images on disk using grub2
Contents
Introduction
This document describes how to install Mageia Linux from an install ISO image stored on disk.
The benefits of doing this are:
- Once the initial preparation has been completed it is quite a fast method
- No need to burn the Mageia install ISO to CD or DVD or USB
- If you are doing repeated installs (eg for testing) this method should save you time
- We can add a local on-disk urpmi rpm repository in the ISO file
Overview
You will need a relatively small capacity USB memory stick. 128mb will be sufficient.
Mageia install ISO files can be downloaded from: https://www.mageia.org/en/downloads/.
Preparation
-
Create a new separate partition on the disk drive of the machine to be installed and label this volume INSTALL-ISO.
Labelling the volume will help you later if you are trying to find the correct partition name containing your install ISO image(s).
The new partition needs to be large enough to store at least one Mageia install ISO. So, for Mageia 4, that would be about 5gb.
You may wish to make this larger if you plan on having several ISO images to choose from for the install process. - Mount the new partition as, for example, /mnt/install-iso/.
- Copy the install image ISO file you wish to install with to /mnt/install-iso/.
- Make a note of the file name of the Mageia install ISO because you will need to reference this later.
-
Make a note of the partition which you have /mnt/install-iso/ mounted on.
This is easy to find using the df command.
For example:
$ df | grep install-iso
/dev/sda1                 16G  1.1G   14G   8% /mnt/install-iso
In this example, the df command shows the partition is /dev/sda1.
-
Select and download the network installer ISO image for either 32 or 64 bit (whichever you need for the computer you are installing on) from: https://www.mageia.org/en/downloads/.
You should find this under the heading Wired Network-based Installation CD. -
Copy this network installer ISO image to your (small) USB memory stick (for example by using the dd command).
For example:# CAUTION: take care when using "dd" to specify the correct output for "of=" # because if you specify the wrong device you could easily trash your system on disk $ /usr/bin/sudo dd if=/tmp/boot-nonfree.iso of=/dev/sdc bs=128M
If you have Mageia 4 or later, Isodumper is available from the online repos is you wish to use a GUI to burn the network installer.iso to USB
Also, if the computer you need to install on is not capable of booting from a USB memory stick then you could instead burn the network installer ISO image to a CD instead and use that for the installing Mageia process instead of a USB stick.
For a more detailed explanation of making a bootable Mageia network install USB, please see: Making_a_bootable_Mageia_network_install_USB_drive.
Installing Mageia
Boot your computer with the USB memory stick containing he network installer ISO image and follow these steps:
-
Screen-1:
Welcome to Mageia install help
Press the enter-key

-
Screen-2:
Please choose the installation method
Use down-arrow to select Hard disk and press tab-key to highlight OK then press the enter-key.

After highlighting Hard disk and press tab-key to highlight OK then press the enter-key.

-
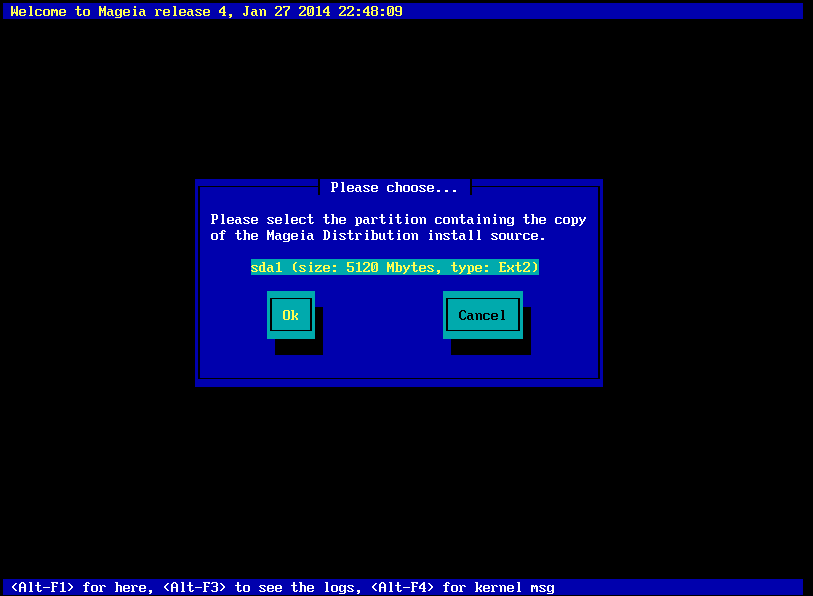
Screen-3:
Please select the partition containing the copy of the Mageia Distribution installation source
Use the arrow keys to highlight the correct partition then press the tab-key to highlight OK then press the enter-key.

After highlighting the partition, press tab-key to highlight OK then press the enter-key.
-
Screen-4:
Please enter the directory (or ISO image file) containing the Mageia Distribution installation source
Press the enter-key twice and you should be presented with the ISO file(s) in the INSTALL-ISO partition.

After pressing the enter-key two times you should see a screen showing names of ISO files on the partition.
-
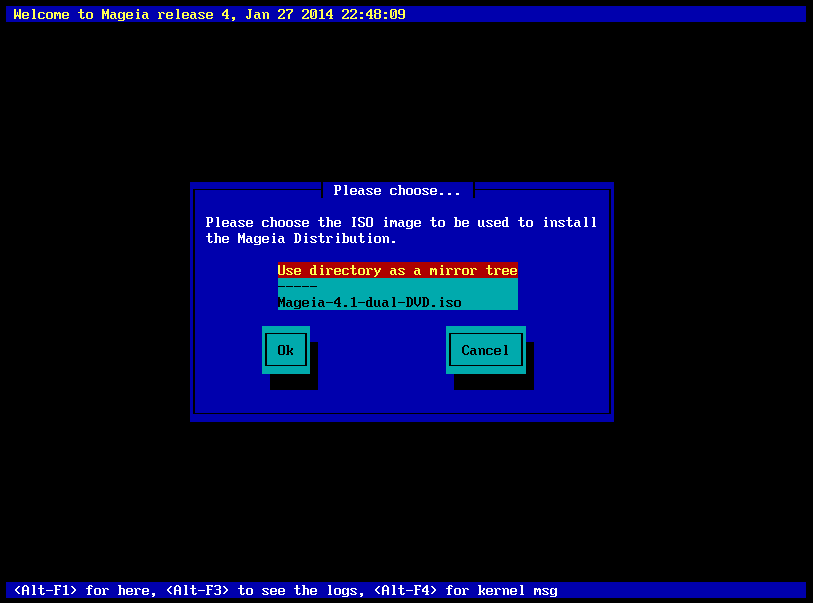
Screen-5:
Please choose the ISO image to be used to install the Mageia Distribution
Use the arrow keys to highlight the correct install ISO file name, press the tab-key to highlight OK then press the enter-key.
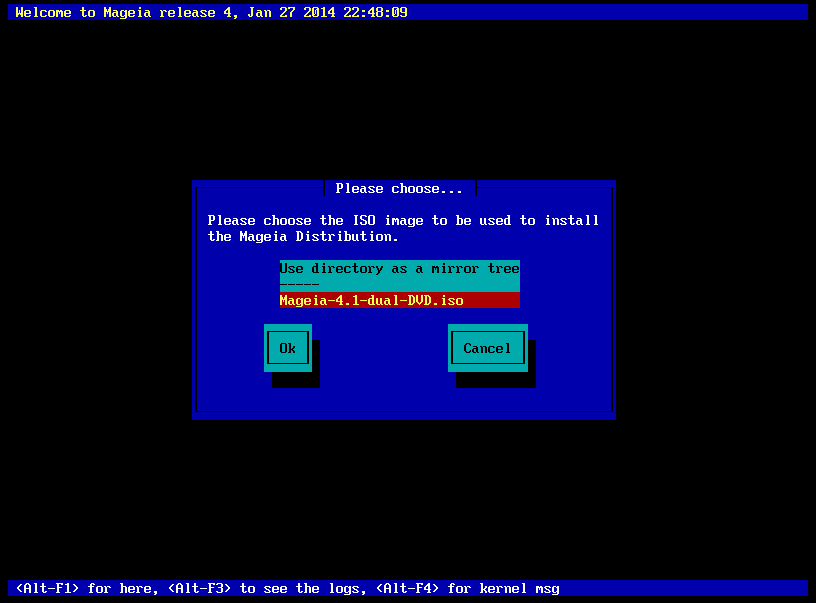
After highlighting the ISO file name, press tab-key to highlight OK then press the enter-key.

-
You should now be presented with the Mageia installer screen from the ISO image you are installing.
Follow the normal install process.


Post install - adding a local urpmi rpm repository in the ISO file
When the newly installed system is booted you will see that the install-iso partition has been mounted as /mnt/hd/.
We can modify this with the following commands (as root):
- mkdir /mnt/install-iso
- umount /mnt/hd/
- f=/etc/fstab; sed -e "s,/mnt/hd,/mnt/install-iso," < ${f} > ${f}+ && mv -f ${f} ${f}- && mv ${f}+ ${f}
- mount /mnt/install-iso
Next, we can loop-mount the Mageia ISO file (as root):
- mkdir /mnt/Mageia-4.1-dual-DVD
- echo "/mnt/install-iso/Mageia-4.1-dual-DVD.iso /mnt/Mageia-4.1-dual-DVD iso9660 ro,loop 0 0" >> /etc/fstab
- mount /mnt/Mageia-4.1-dual-DVD
Now, we can add the urpmi rpm repository from the ISO to our system:
In this example, we are using the dual-arch Mageia 4.1 ISO which has i586 for 32 bit and x86_64 for 64 bit. So, we have to select the right one for our system.
The command "uname -m" will show whether we are on a 32 or 64 bit system.
for 32 bit: urpmi.addmedia install-iso --distrib /mnt/Mageia-4.1-dual-DVD/i586/media/
for 64-bit: urpmi.addmedia install-iso --distrib /mnt/Mageia-4.1-dual-DVD/x86_64/media/